VsCodeでspring security
VsCodeでspring bootで認証画面
spring securityを使用する
つづいて、spring securityを使ってログイン画面を作ってみましょう。このspring securityを使うとbootstrap4で作られたログイン画面が勝手に表示されますので、その画面は作る必要がありません。その代わりいろいろと文章に書いてない約束事を守らないといけません。
先の項目まではネットで調べながらなんとかできましたが、ここは統一して説明してくれているサイトが少なく、あってもなんちゃってなので、困ったときの 「掌田津耶乃先生」で「Spring Boot3プログラミング入門」を見てやりました。
- 認証画面を出す
- ログインはできないもののとにかく認証画面を出すことができます
- データベースを使用する
- 例によってSQLServerに接続します
- 入れる場所と入れない場所
- どこに入れてどこに入れないかを設定します
- 最初のログイン
- 実験用のデータを作りログインしてみます
認証画面を出す
なにはともあれ「CTRL+SHIFT+P」でspring initializrを起動します。
Maven,3.3.1,java,17と選択して上のdependencyを入れてください。
今回はdependencyが多いです
- spring web
- tomcatを利用するアプリを作ります
- thymeleaf
- jspではなくhtmlでパラメータ渡しを行います
- spring security
- 認証を自動で行えるようにします
- h2 database
- 我々は使用しませんが内部で使用するようで必要です
- MS SQL(Microsoft SQLServer) driver
- 今回もSQLServerに接続します
これで収まらず、あと手入力で2つ追加してください
- webjars bootstrap
- 今回もbootstrap5を入れます
- SQLServer windows認証
- 接続でid,passwordを入れたくないのでwindows認証させます
なので結局pom.xmlは以下のようになります
	<dependencies>
		<dependency>
			<groupId>org.webjars</groupId>
			<artifactId>bootstrap</artifactId>
			<version>5.3.0</version>
		</dependency>
		<dependency>
			<groupId>org.springframework.boot</groupId>
			<artifactId>spring-boot-starter-data-jdbc</artifactId>
		</dependency>
		<dependency>
			<groupId>org.springframework.boot</groupId>
			<artifactId>spring-boot-starter-thymeleaf</artifactId>
		</dependency>
		<dependency>
			<groupId>org.springframework.boot</groupId>
			<artifactId>spring-boot-starter-web</artifactId>
		</dependency>

		<dependency>
			<groupId>com.microsoft.sqlserver</groupId>
			<artifactId>mssql-jdbc</artifactId>
			<version>12.6.1.jre11</version>
		</dependency>
		<dependency>
			<groupId>com.microsoft.sqlserver</groupId>
			<artifactId>mssql-jdbc_auth</artifactId>
			<version>12.6.1.x64</version>
			<type>dll</type>
		</dependency>
		<dependency>
			<groupId>org.springframework.boot</groupId>
			<artifactId>spring-boot-starter-security</artifactId>
		</dependency>
		<dependency>
			<groupId>com.h2database</groupId>
			<artifactId>h2</artifactId>
			<scope>runtime</scope>
		</dependency>

		<dependency>
			<groupId>org.springframework.boot</groupId>
			<artifactId>spring-boot-starter-test</artifactId>
			<scope>test</scope>
		</dependency>
	</dependencies>
どれも調べるのに苦労しました。先生と違うことしてるので仕方ないです。特に苦労したのはauthでこれはデフォルトではjarファイルを探しに行ってしまいますが、 Microsoftはdllファイルしか出していませんのでtypeをdllにしないといけません。versionはその時に合わせて変えてください。
ということで結構な数になってしまいました。
では、ログイン画面を作らないと、、、、いりません。これで起動して localhost:8080にアクセスすると認証画面が表示されます。が、なにもできません。
データベースを使用
では、今度はデータベースに接続する準備をしていきます。
このspring data jdbcを使うと、接続文字列をプログラム中に書かなくてよくなります。その代わりresourcesのapplication.propertiesに宣言を入れることになります。
	spring.application.name=spsqljdbc
	spring.datasource.driver-class-name=com.microsoft.sqlserver.jdbc.SQLServerDriver
	spring.datasource.url=jdbc:sqlserver://localhost\\SQLEXPRESS:1433;databaseName=Mydb;IntegratedSecurity=true;TrustServerCertificate=true;
1行目は初めから入っていますので、2行目3行目を書きます。ここでdatabaseNameのMydbはデータベース名で自分で作ったものです。ここにwindows認証で接続します。
続いてデータベース側の準備をするのでSQLServer management studioを起動します。
	CREATE DATABASE MYDB;

	create table users (
	id int primary key identity(1,1) not null,
	username nvarchar(255) not null,
	password nvarchar(255) not null,
	enabled tinyint not null
	);

	create table authorities (
	id int primary key identity(1,1) not null,
	username nvarchar(255) not null,
	authority text not null
	);
usersテーブルにusernameとpasswordとenabled、そしてauthoritiesテーブルにusernameとauthorityがあればよいようです。
実はデフォルトのユーザースキーマが決まっていて、これさえあればというものがあります。
	create table users(
		username varchar_ignorecase(50) not null primary key,
		password varchar_ignorecase(500) not null,
		enabled boolean not null
	);

	create table authorities (
		username varchar_ignorecase(50) not null,
		authority varchar_ignorecase(50) not null,
		constraint fk_authorities_users foreign key(username) references users(username)
	);
	create unique index ix_auth_username on authorities (username,authority);
基本がこれで、これに沿っていればいいようです。内容は後程プログラムで作成します。なぜならpasswordはbcryptで作らないといけないからです。
入れる場所と入れない場所
ようやく、プログラムに掛かります。
最初にinitializrで作ったソースは今回も何も触りません。そのままです。
そして、兄弟のクラスファイルを追加します。SampleSecurityConfig.javaを追加します。そしてアノテーションです。 @Configurationと@EnableWebSecurityを付けたクラスを作ります。
	package jp.co.etlab.spsqljdbc;

	import javax.sql.DataSource;

	import org.springframework.beans.factory.annotation.Autowired;
	import org.springframework.context.annotation.Bean;
	import org.springframework.context.annotation.Configuration;
	import org.springframework.security.config.annotation.web.builders.HttpSecurity;
	import org.springframework.security.config.annotation.web.configuration.EnableWebSecurity;
	import org.springframework.security.core.userdetails.User;
	import org.springframework.security.core.userdetails.UserDetails;
	import org.springframework.security.crypto.factory.PasswordEncoderFactories;
	import org.springframework.security.provisioning.JdbcUserDetailsManager;
	import org.springframework.security.provisioning.UserDetailsManager;
	import org.springframework.security.web.SecurityFilterChain;

	@Configuration
	@EnableWebSecurity
	public class SampleSecurityConfig {
		@Bean
		public SecurityFilterChain filterChain(HttpSecurity http) throws Exception{
			http.csrf(csrf -> csrf.disable());
			http.authorizeHttpRequests(authorize-> {
				authorize
					.requestMatchers("/").permitAll()
					.requestMatchers("/js/**").permitAll()
					.requestMatchers("/css/**").permitAll()
					.requestMatchers("/webjars/**").permitAll()
					.anyRequest().authenticated();
			});
			http.formLogin(form->{
				form.defaultSuccessUrl("/secret");
			});
			return http.build();
		}

		@Autowired
		private DataSource dataSource;

		@Bean
		public UserDetailsManager userDetailsManager() {
			JdbcUserDetailsManager users = new JdbcUserDetailsManager(this.dataSource);

			//ユーザー登録
			users.createUser(makeUser("taro","yamada","USER"));
			users.createUser(makeUser("hanako","flower","USER"));
			users.createUser(makeUser("sachiko","happy","USER"));

			return users;
		}

		private UserDetails makeUser(String user, String pass, String role) {
			return User.withUsername(user)
				.password(
					PasswordEncoderFactories
						.createDelegatingPasswordEncoder()
						.encode(pass))
				.roles(role)
				.build();
		}

		// @Bean
		// public InMemoryUserDetailsManager userDetailsManager() {
		//     String username = "user";
		//     String password = "password";

		//     UserDetails user = User.withUsername(username)
		//         .password(
		//             PasswordEncoderFactories
		//                 .createDelegatingPasswordEncoder()
		//                 .encode(password))
		//         .roles("USER")
		//         .build();
		//     return new InMemoryUserDetailsManager(user);
		// }
	}
SecurityFilterChainを返すfilterChain()メソッドを作ります。ここでどこに入って良くてどこはだめというものを宣言します。
最初、index.htmlがどうしてもbootstrapが効かなくて困りましたが、/webjarsを許可してなかったのでbootstrapが効かなかったのでした。
このようにして、使えるurlをpermitAll()で許可していきます。
続いて、userDetailsを返すメソッドとuserDetailManagerを返すメソッドを宣言して、初回この3つのユーザーを追加します。
passwordに指定しているのはbcryptにencode()した暗号化されたpasswordです。これで初回ユーザーが出来たらコメントで止めましょう。
最後にコメント止めされているInMemoryUserDetailsManagerがありますが、データベースを使用せず、管理者だけログインできればいい時に使用してください。このサンプルがよくサイトに載っています。
最初のログイン
つづいて、また兄弟のクラスを追加します。SampleSecurityController.javaです。
こちらは@Controllerアノテーションを付けて、どのurlにGETしたら、どの処理をするのかを書きます
	package jp.co.etlab.spsqljdbc;

	import org.springframework.stereotype.Controller;
	import org.springframework.web.bind.annotation.RequestMapping;
	import org.springframework.web.bind.annotation.RequestMethod;
	import org.springframework.web.servlet.ModelAndView;

	import jakarta.servlet.http.HttpServletRequest;

	@Controller
	public class SampleSecurityController {
		@RequestMapping(value="/", method=RequestMethod.GET)
		public ModelAndView index(ModelAndView mav) {
			mav.setViewName("index");
			mav.addObject("title", "Index page");
			mav.addObject("msg", "This is top page");
			return mav;
		}

		@RequestMapping(value="/secret", method=RequestMethod.GET)
		public ModelAndView requestMethodName(ModelAndView mav, HttpServletRequest request) {
			String user = request.getRemoteUser();
			String msg = "This is secret page. [login by \"" + user + "\"]";
			mav.setViewName("Secret");
			mav.addObject("title", "Secret page");
			mav.addObject("msg", msg);
			return mav;
		}

	}
url localhost:8080/ にアクセスしたらindex()メソッドが起動されます。
MOdelAndViewクラスを使ってindex.htmlの呼び出しと、そこに渡すtitle変数とmsg変数を記述しています。
また、 localhost:8080/secret にアクセスしたら secret()メソッドが起動されます。secret.htmlの呼び出しとそこに渡すtitle変数とmsg変数を記述しています
つづいて、だれでもアクセスできるindex.htmlとlogin後だけアクセスできるsecret.htmlを記述します。
	<!DOCTYPE html>
	<html lang="ja" xmlns="http://www.w3.org/1999/xhtml"
					xmlns:th="https://www.thymeleaf.org"
					xmlns:sec="https://www.thymeleaf.org/thymeleaf-extras-springsecurity3">
	<head>
		<meta charset="UTF-8">
		<meta name="viewport" content="width=device-width, initial-scale=1.0">
		<title th:text="${title}"></title>
		<link th:href="@{/webjars/bootstrap/5.3.0/css/bootstrap.min.css}" rel="stylesheet">
	</head>
	<body>
		<div class="container">
			<main class="py-5 text-center">
				<h1 class="display-4 mb-4" th:text="${title}"></h1>
				<div class="border border-1 p-3">
					<p class="h6" th:text="${msg}"></p>
					<p>Click <a th:href="@{/secret}">here</a> to see a secret page.</p>
				</div>
			</main>
		</div>
		<script th:src="@{/webjars/bootstrap/5.3.0/js/bootstrap.min.js}"></script>
	</body>
	</html>
Clickでhrefで/secretへのアクセスを行いますが、ここは入れない場所なので認証が画面が表示され、そこを経由した場合だけsecretに行けます。
	<!DOCTYPE html>
	<html lang="ja" xmlns="http://www.w3.org/1999/xhtml"
					xmlns:th="https://www.thymeleaf.org"
					xmlns:sec="https://www.thymeleaf.org/thymeleaf-extras-springsecurity3">
	<head>
		<meta charset="UTF-8">
		<meta name="viewport" content="width=device-width, initial-scale=1.0">
		<title th:text="${title}"></title>
		<link th:href="@{/webjars/bootstrap/5.3.0/css/bootstrap.min.css}" rel="stylesheet">
	</head>
	<body>
		<div class="container">
			<main class="py-5 text-center">
				<h1 class="display-4 mb-4" th:text="${title}"></h1>
				<div class="border border-1 p-3">
					<p class="h6" th:text="${msg}"></p>
					<p>Click <a th:href="@{/logout}">here</a>to logout.</p>
				</div>
			</main>
		</div>
		<script th:src="@{/webjars/bootstrap/5.3.0/js/bootstrap.min.js}"></script>
	</body>
	</html>
Mavenを使ってinstall,compile,packageしてspring boot dashboardから起動してみましょう。起動して localhost:8080にアクセスするとデータベースにユーザーが書き込まれます。
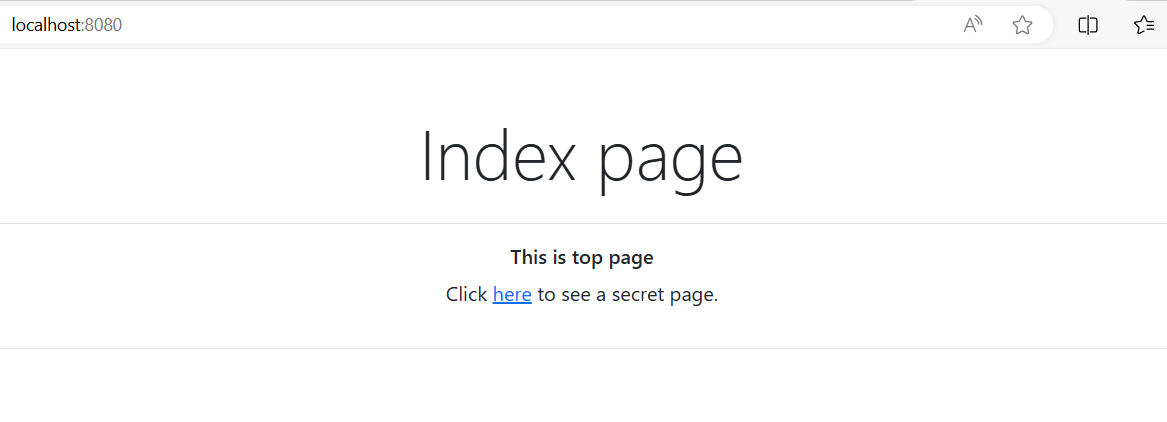
まずは、だれでも来ることができるindex.htmlです。ここから/secretに行こうとします。
しかし、secretは認証が必要な場所ですから、認証に飛ばされます
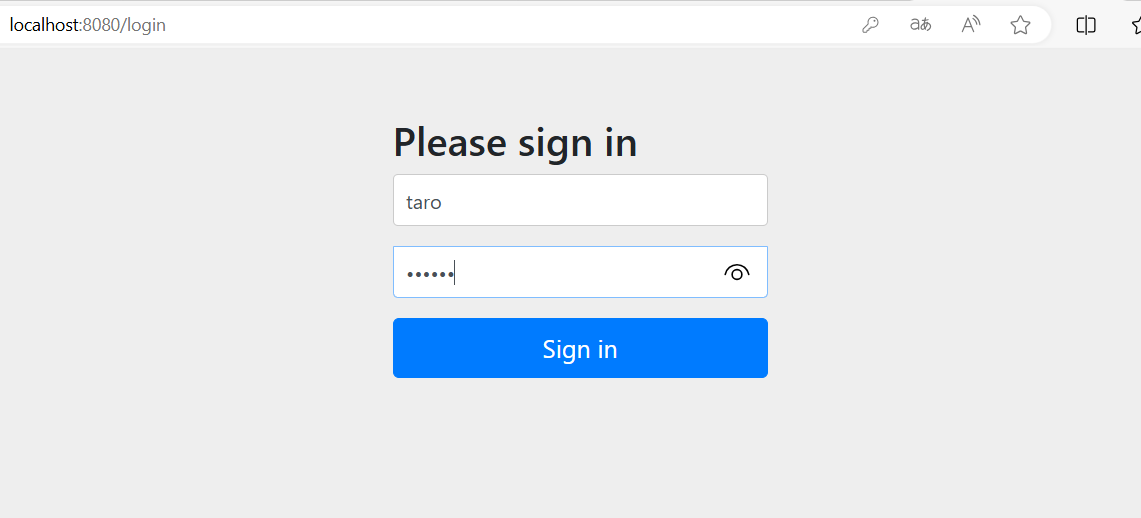
データベースに登録されたIDとpasswordでログインします
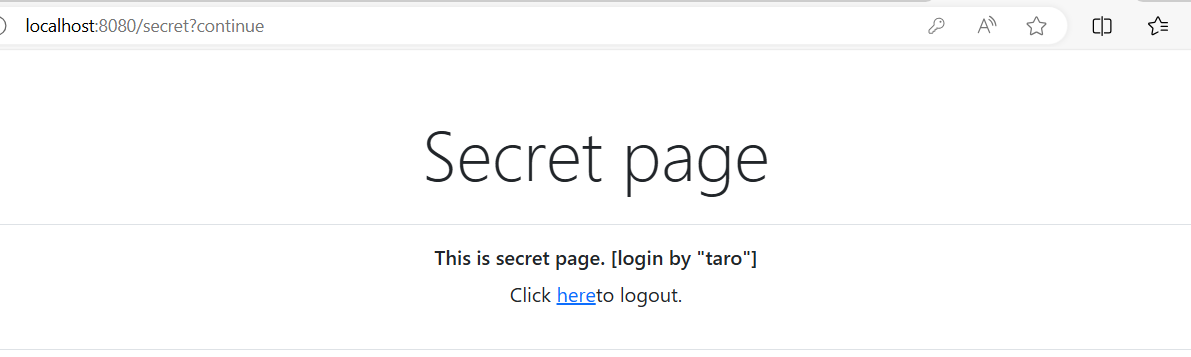
みごとに入ることができました。そしてlogoutすると

ログアウトされた画面に移動します
ちなみにusersテーブルの内容は

このようにpasswordのところに{bcrypt}と接頭語がついてpasswordが入っています。同様にauthoritiesテーブルは
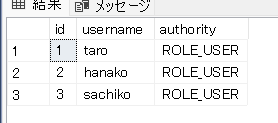
今回はUSERロールしか作りませんでしたが、ADMINを作れば管理者権限を作ることができます。