Gitでバージョン管理
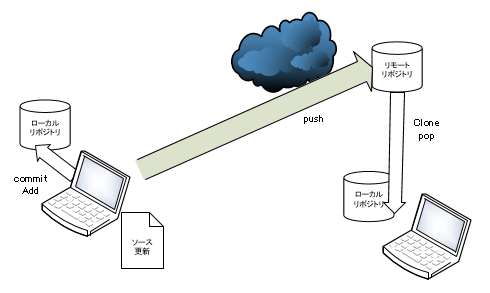
今回はPythonをherokuで公開することを目的としてgitを行います。gitはバージョン管理を行うもので、リモートのgithubとローカルのgitを組み合わせて使います。
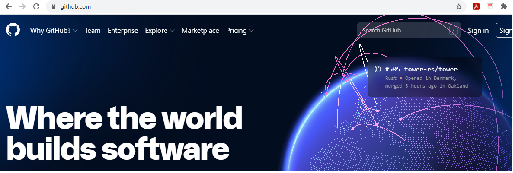
まずは、github.comに行ってgithubのアカントを取っておきましょう。Freeで無制限のパブリック/プライベートのリポジトリを登録できますが、プライベートで月に2000分を超えたり、月に500MBを超える場合は、Teamに切り替えて月$4のコースにしてください。
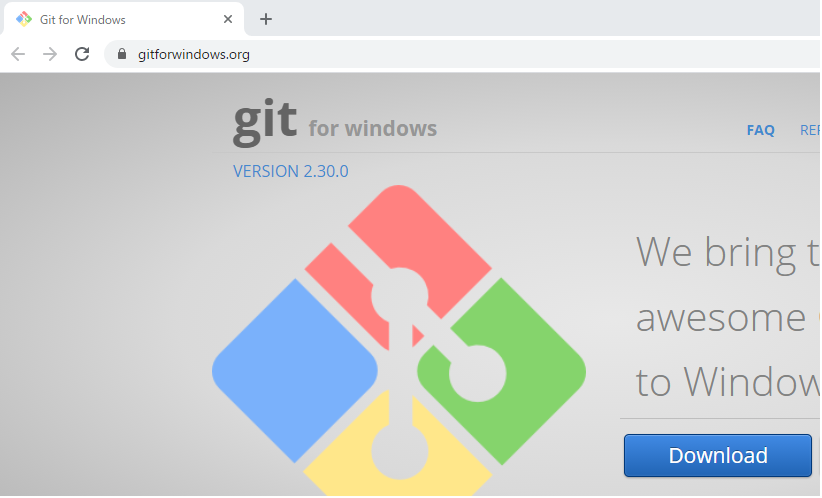
gitをdownloadしてインストールします
gitforwindows.orgでローカル用の環境をダウンロードします
ダウンロードしたらダブルクリックで起動して「next」「next」で入れていきます。editorの選択は自分が使っているものを選んでください。またPATHのところではgit bashしか使わないのであればgit bash onlyで構いません。それ以外は一番上の選択肢で構いません。installが終わったら、Gitのアプリグループの中にGit Bashが登録されるはずです。
初期設定では Git Bashを起動してください。まず先程作ったgithubの設定をローカルにも設定します。
git config --global user.name "githubのユーザー名"
git config --global user.email githubのemailアドレス
これでgithubとgitの繋がりが設定できました
pythonのWebのサンプルを作ってみましょう。Git Bashを起動します。
ls
lsと入力すると、カレントのフォルダーのファイル一覧が表示されます。コマンド体系はLinuxです。
フォルダー作成ここにフォルダーを作って、ローカルレジストリを作成します。
mkdir pythonWebSample
cd pythonWebSample
echo "# webSample" >> README.md
git init
git initをすることでローカルレジストリーが作成されます。
git add README.md
git commit -m "at first readme"
さきほど仮に作ったREADMEを追加して、コメントを入れてコミットします。これでまず最初のレジストリーが作成されました。コマンドの最後に(master)と表示されます。masterというブランチが自動作成されています。
masterブランチは基本的に変更しないようなので、githubのお勧めに従って、mainブランチに名前を変えて作業をすることにします。
git branch -M main
また、githubとの連携の設定を宣言するので、以下のように入力します。ただし、みなさんは違うアカウントですからそれぞれ書き換えてください。
git remote add origin https://github.com/アカウント名/webSample.git
まだgithubへの認証ができていません。ここで一度ログインして認証を行います
git push -u origin main
今回はやりませんが、もし別ブランチを作って行う場合は、このような流れになります
git branch main
git checkout main
git add ファイル名
git commit -m "なにか"
git push origin main
リモートに公開して、みんなの意見を聞く
git checkout master
git pull origin master
git merge main
git push origin master
git checkout main
まず、mainブランチを作成して、mainに移動し、変更を加え、コメントを書き、リモートに一度pushして、みんなの意見を聞き、OKならばmasterに移動して、リモートのレジストリをmasterに受けて、mainと混合して、新たなmasterをリモートレジストリにpushして、またmainに移動しておく
pythonのプログラム作成では、pythonでWebアプリを作っていきます。今回はFlaskを使用して、get,postのデータの送受信を行います。
なので、flaskをinstallしておいてください
pip3 install Flask
適当なフォルダーに app.pyを作ります。その配下に staticとtemplatesフォルダーを作っておきます。
整数を2つ入力して、次の画面でそのべき乗を計算して表示するという簡単なサンプルです。
app.py
from flask import Flask, render_template
from flask import request
import time
import datetime
import signal
import sys

app = Flask(__name__)

@app.route("/")
def hello():
	return render_template('index.html')

@app.route("/calc",methods=['POST'])
def connect():
	print("calc called")
	num1 = int(request.form['num1'])
	num2 = int(request.form['num2'])
	powered=0
	try:
		powered = num1 ** num2
		print("data:",num1,num2,powered)
	except:
		pass
	return render_template('calc.html', a=num1,b=num2,c=powered)

def sigint_handler(signal,frame):
	sys.exit(0)

if __name__ == '__main__':
	signal.signal(signal.SIGINT, sigint_handler)
	app.run(host='0.0.0.0', port=5000, debug=True)
このapp.pyでindex.htmlとcalc.htmlをコントロールして、入力データの受け渡しを行います。
表示する index.htmlと calc.htmlは templatesフォルダーに作成します。
/templates/index.html
<!DOCTYPE html>
<html lang="ja">
	<head>
		<meta charset="UTF-8">
		<title></title>
		<link rel="stylesheet" type="text/css"
			href="{{ url_for('static', filename='style.css')}}">
	</head>
	<body>
		<h1>べき乗の計算</h1>
		<div class="wrap">
		<p>pythonでべき乗の計算をします。整数を2つ入力してください。</p>
		<form action="/calc" method="post">
			<dl>
				<!-- もとの数 -->
				<input type="text" name="num1" size="20" maxlength="200">の
				<!-- べき乗の数 -->
				<input type="text" name="num2" size="20" maxlength="200">べき乗
			</dl>
			<div>
				<!-- submit -->
				<input type="submit" value="計算">
			</div>
		</form>
		</div>
	</body>
</html></pre>
submitで渡されるPOST変数は num1 と num2 です。これをcalc.htmlに渡しますが、その際、Jinja2というFlask付属のテンプレートエンジンを使用します。
/templates/calc.html
<!DOCTYPE html>
<html lang="ja">
	<head>
		<meta charset="UTF-8">
		<title></title>
		<link rel="stylesheet" type="text/css"
			href="{{ url_for('static', filename='style.css')}}">
	</head>
	<body>

		<h1>べき乗の計算</h1>
		<div class="wrap">
		<p>結果</p>
		<dl>
			<!-- 結果 -->
			{{a}}**{{b}}={{c}}
		</dl>
		</div>
	</body>
</html>
staticフォルダーに cssを置いていますので、それも書いておきます。
/static/style.css
@charset "utf-8";
body {
	padding: 0;
	margin: 0;
}
h1 {
	margin-top: 0;
	padding: 20px;
	border-left:10px solid #6ff;
	background:linear-gradient(to bottom right, #aaf, #88f 50%, #66f 80%);
	color:#fff;
}
div.wrap {
	margin: 10px;
	padding:10px;
	background:linear-gradient(to bottom right, #eff, #aff 50%, #9ff 80%);
}
dt {
	border-left:5px solid #66f;
	padding-left: 5px;
}
dd {
	margin:2px 0 4px 3px;
}
一度実行してみましょう
python app.py
 * Serving Flask app "app" (lazy loading)
 * Environment: production
   WARNING: This is a development server. Do not use it in a production deployment.
   Use a production WSGI server instead.
 * Debug mode: on
 * Restarting with stat
 * Debugger is active!
 * Debugger PIN: 281-714-877
 * Running on http://0.0.0.0:5000/ (Press CTRL+C to quit)
127.0.0.1 - - [12/Jan/2021 10:27:46] "[37mGET / HTTP/1.1[0m" 200 -
127.0.0.1 - - [12/Jan/2021 10:27:46] "[37mGET /static/style.css HTTP/1.1[0m" 200 -
127.0.0.1 - - [12/Jan/2021 10:27:47] "[33mGET /favicon.ico HTTP/1.1[0m" 404 -
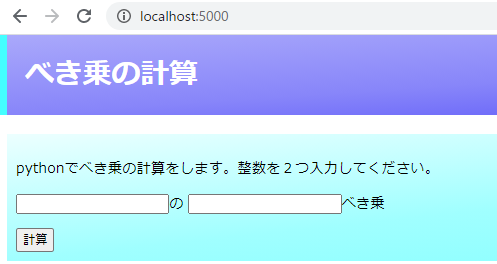
ブラウザを起動して、localhost:5000 とurlを入力すると、プログラムが動きます。もし3と20を入力したら
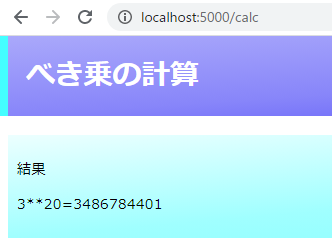
このように表示されます。
git登録Git bashで登録
git add .
git status
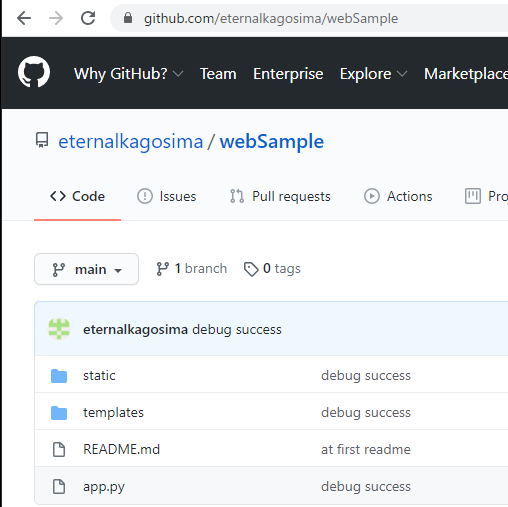
new fileで4つのファイルが対象になったと思います。
git commit -m "debug success"
git push origin main
これでgithubに公開できました。